Getting started
From nothing installed to a first real answer out of a model you already have open. Ten minutes, most of which is the download.
1. Install
There are two routes, and they install the same add-in.
From the Autodesk App Store. The Autodesk App Manager installs it for you. Nothing to copy, no NETLOAD, no configuration — start the host application and the HMK Tools tab is on the ribbon.
From hmktools.com. One installer covers every supported host on the machine. It finds the Autodesk products you have installed and registers itself with each of them.
2. Activate your licence
Click About on the HMK Tools ribbon tab and paste the licence key that was emailed to you. In Revit the activation window also opens by itself the first time you launch after installing.
Do not have a key yet? Create an account at hmktools.com and you get a 30-day trial key, no card required.
3. Open the chat panel
Click Chat on the HMK Tools tab. Pilot Chat docks inside the application like any other palette, and it works on the document you have open right now — there is nothing to upload, import or sync.
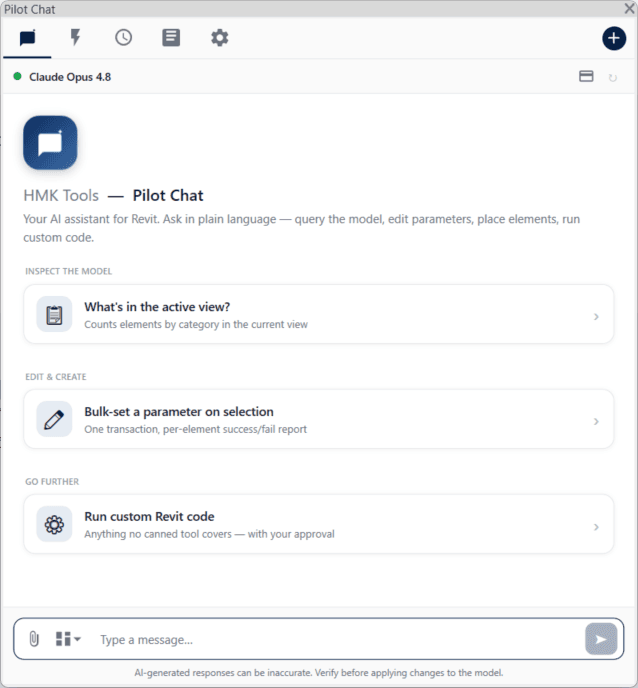
The suggestions on the empty state are there because the first question is the hardest one. Click one and watch what it does before you write your own.
4. Ask for something real
Skip “hello”. Ask for something you would otherwise have clicked through, so you can judge the answer against work you already understand:
- “What’s in the active view? Break it down by category.”
- “Which elements are missing a Mark value?”
- “List every warning in this model, grouped by type.”
Read-only questions like these are the right place to start: nothing changes, and you get a feel for how much context it already has. How to ask covers the phrasing that makes edits land first time.
5. Decide how you want to drive it
There are two ways to use the same tools, and you can use both.
The panel inside the application. Nothing else to install or configure. Bring your own provider API key in Settings, or use it with the model already configured.
Your own AI client. Click Connector and the add-in starts a local MCP server, so Claude Desktop, Claude Code, ChatGPT / Codex, Cursor or Google Antigravity can operate the live session. Connect your AI client walks through it — it is one click.
Where to go next
- How to ask — the difference between a request that works and one that wanders.
- Troubleshooting — the add-in did not appear, the client sees no tools, and the rest.
- Your product: Revit, AutoCAD & Civil 3D or Navisworks.