Connect your AI client
The add-in can expose the live session to your own AI client over the Model Context Protocol. Setup is one click from inside the application — there is no config file to hand-edit.
What actually happens
Clicking Connector starts a small HTTP server bound to 127.0.0.1 — your machine only, never the network. A bundled bridge executable relays between that server and your AI client over standard input/output, which is the transport MCP clients expect.
The server is off until you start it, and it stops when you stop it or close the host application. Nothing keeps running in the background afterwards.
The one-click setup
- 1Open Settings on the HMK Tools ribbon tab, then the Setup Guide tab.
- 2Pick your client: Claude Desktop, Claude Code, ChatGPT / Codex, Cursor, Google Antigravity.
- 3Click the setup button. It writes its own entry into that client’s MCP configuration and nothing else.
- 4Restart the AI client so it re-reads its configuration, then ask it something about the open document.
Which server name to expect
Each product registers under its own name, so you can have all four connected at once and the client will not confuse them.
| Product | Server name | Default port |
|---|---|---|
| Revit | hmk-pilot | 7823 |
| AutoCAD & Civil 3D | hmk-cad | 7900 |
| Navisworks | hmk-navis | 7950 |
The port is configurable in Settings. Change it only if something else on the machine already uses it — and re-run the setup afterwards so the client is pointed at the new one.
Checking it worked
Two places tell you, and they answer different questions.
In the host application, the ribbon shows Connected or Disconnected, and which connector name reaches this particular window. That is the server side.
In your AI client, the tools should appear in its tool list. If the client shows the server but no tools, the connector is not running — start it from the ribbon. If the server is missing entirely, the client has not re-read its configuration; restart it. Both cases are covered in Troubleshooting.
Several windows open at once
If you run more than one Revit, AutoCAD & Civil 3D or Navisworks window, tool calls go to the window you opened first, and every reply says which one that was — so you are never guessing which model just changed.
To address each window separately, turn on the multi-instance pool in the same Setup Guide. Each window then gets its own connector name and your client can target them individually.
Controlling what it can do
Settings → Tools lists every tool with a checkbox. Anything you disable is hidden from the client completely — it does not appear in the tool list at all, so the assistant cannot call it and cannot even see that it exists.
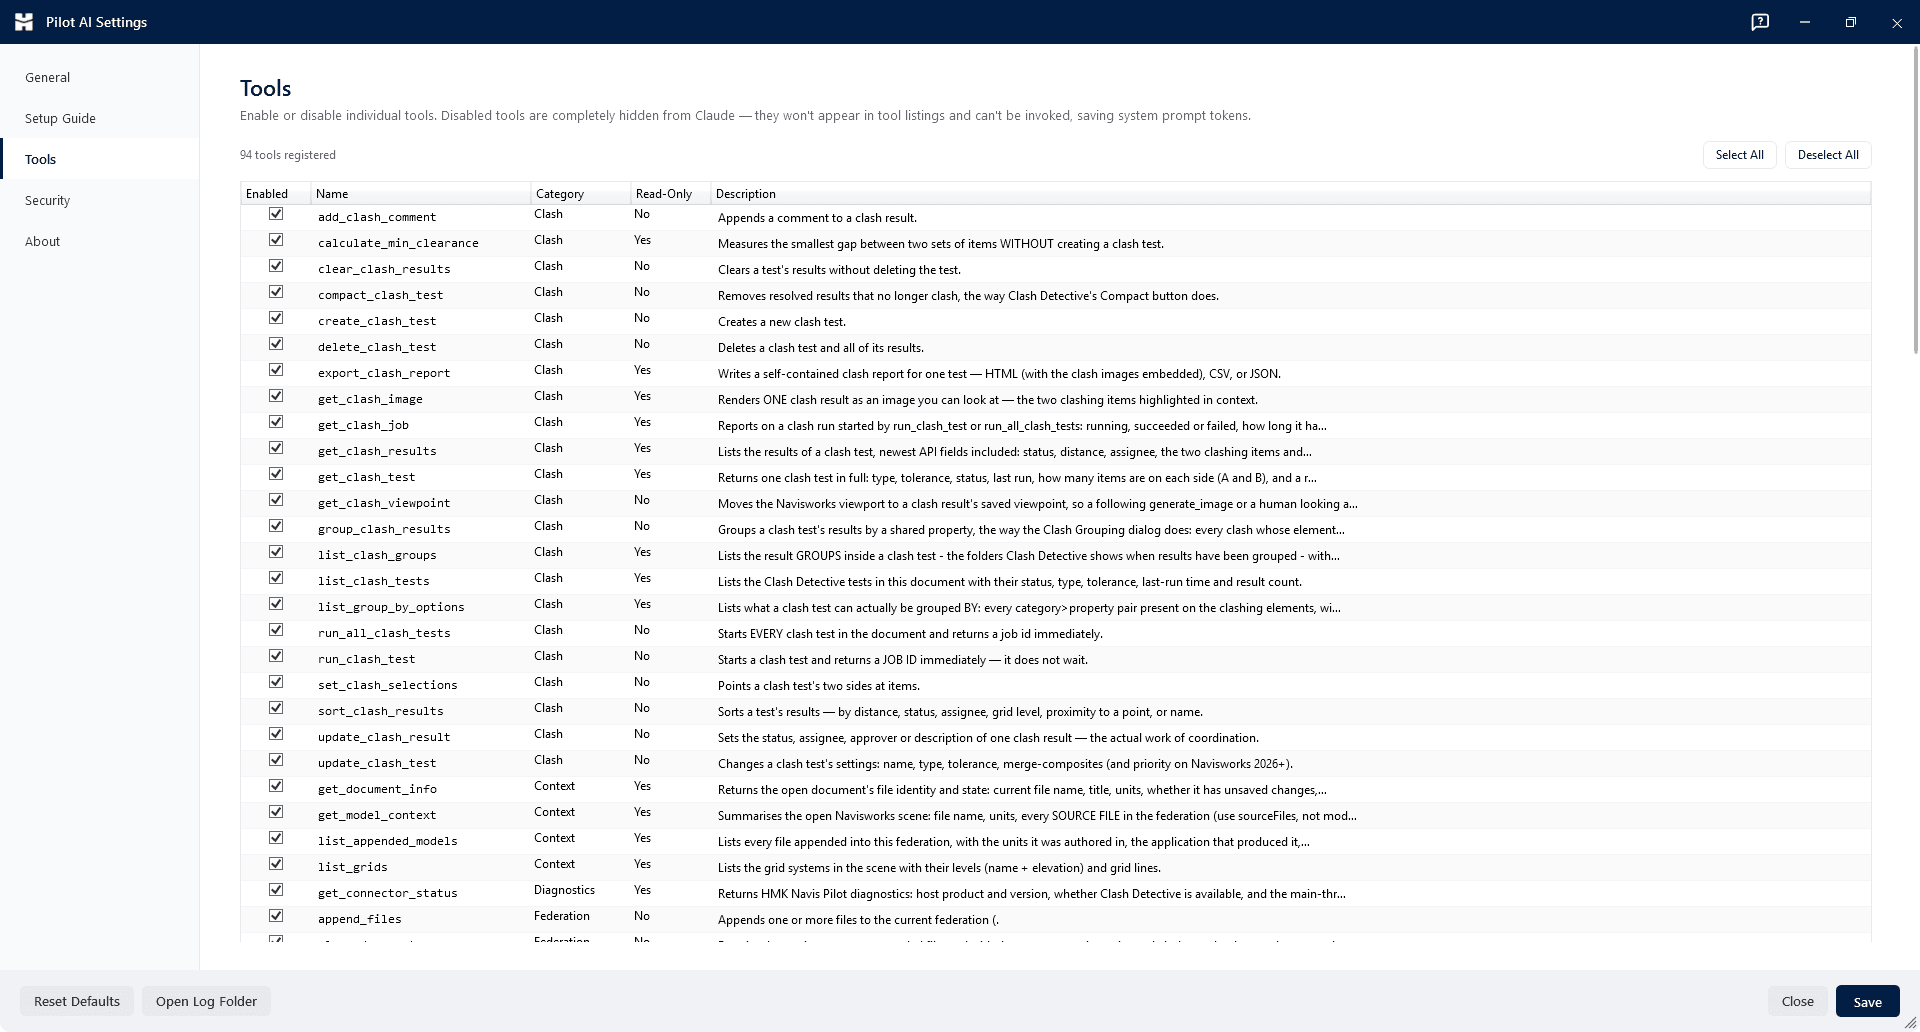
The Read-Only column is the useful one: leave every read-only tool enabled and switch off the writers, and you have an assistant that can answer anything about the document and change nothing in it.
The code-execution tool is the one worth a decision: it compiles and runs C# against the live document, which is what makes anything outside the named tools possible. Submitted code is screened first against a blocklist covering file system changes, process launching, network access and the registry — and the whole feature can be switched off centrally if you want a fixed, auditable tool surface.